
A polished product explainer can still miss the mark if it starts with the product instead of the problem. Learning how to create an effective product explainer video means putting the audience’s needs first, then building a clear story around the solution. It’s easy to focus on features, visuals, o...
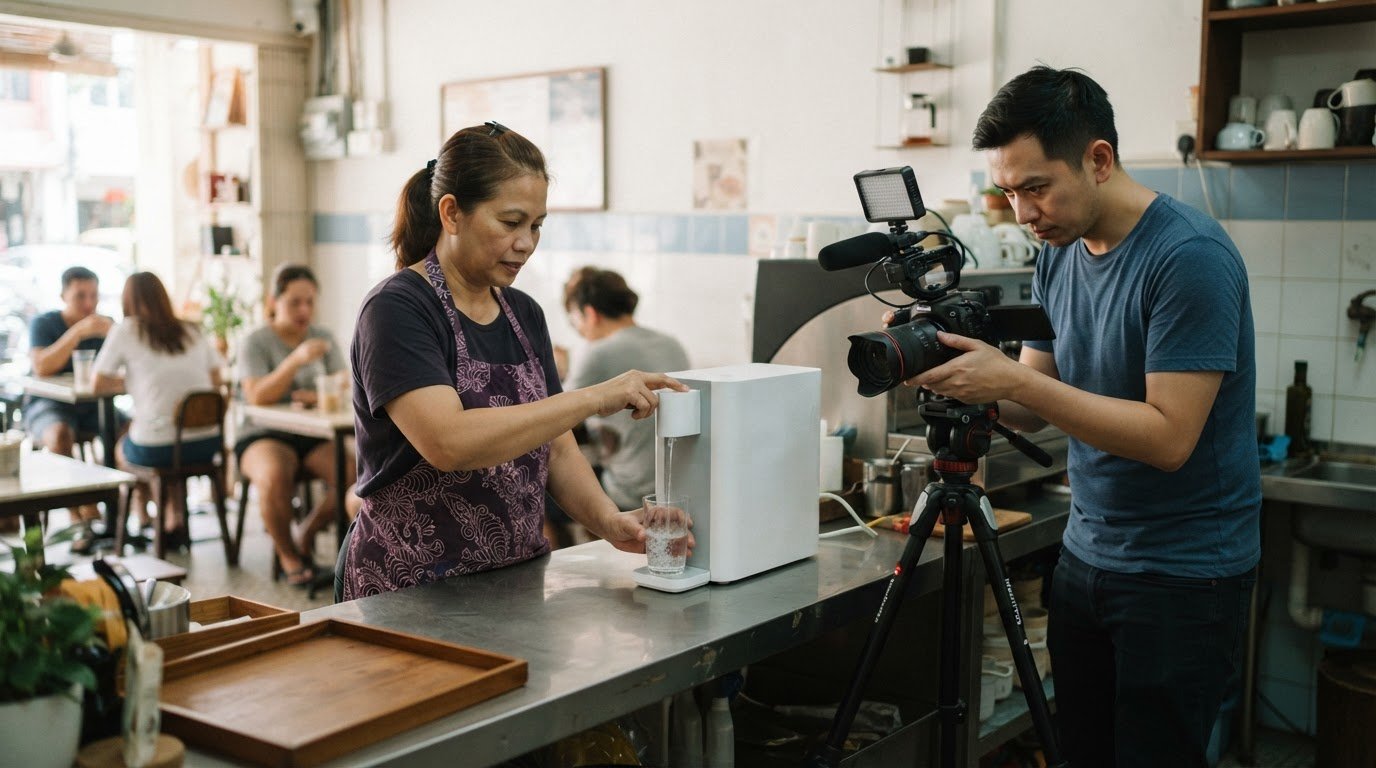
A polished product explainer can still miss the mark if it starts with the product instead of the problem. Learning how to create an effective product explainer video means putting the audience’s needs first, then building a clear story around the solution.
It’s easy to focus on features, visuals, or production costs before deciding what the video needs to achieve. A strong explainer starts with a specific objective and a useful message. From there, every creative choice has a purpose.
This guide covers the process, from defining your goal and identifying audience pain points to writing a focused script and choosing where to share the finished video. You’ll also see how format, length, and production scope affect costs, helping you plan with greater clarity. The result is a practical framework for making your product easier to understand and giving viewers a clear next step.
• Set one clear objective so every creative decision supports what the video needs to achieve.
• Build the story around a specific audience pain point, then show how the product helps address it.
• Keep the script focused on benefits, with a strong opening and a clear next step for viewers.
• Choose placements and formats based on where your audience will watch and what they need to understand.
• Plan production costs around the video’s style, scope, and intended use across channels.
For a product that takes several steps to understand, a video can show the process instead of asking viewers to imagine it. Keep a product explainer focused: a simple message often fits 60 to 90 seconds, while more detailed onboarding may need longer. End with one clear call to action, such as viewing product details or requesting a demonstration.
For publication in Malaysia, treat copyright permissions and truthful advertising claims as essentials. Use music and visuals you own or have permission to use, and ensure product claims are accurate and supported.
For clear narration, choose a quiet space, speak at a steady pace, and keep background music low enough not to compete with the voice. Add subtitles that match the spoken words, then review them with the video to catch timing or wording errors.
Measure performance against the video’s goal: track views and completion for awareness, then landing-page actions for conversion. Calculate conversion rate by dividing completed target actions by relevant visits, and compare the results across placements or versions.
Use live action to show a physical product in context, such as a device being assembled. Choose an animated explainer when diagrams can make an invisible process easier to follow. A screen recording suits software walkthroughs, while motion graphics can clarify data, steps, or abstract ideas.
Use 2D animation for clear, graphic explanations, or 3D when viewers need to see shape, depth, or movement. Whiteboard animation can guide viewers through a sequence of ideas. Live action brings people, settings, and real product interactions into view.
An animated explainer might show a customer moving from a recurring problem to a product solution. A live-action version could show the product in use, then highlight the result. Keep each scene tied to the same audience need.
Aim for 60 to 90 seconds when explaining a straightforward product. Give a complex process enough room to make sense, but remove scenes that repeat information or delay the main point.
Put a concise version on the landing page beside the relevant product details. Use an email to introduce a focused benefit, or a YouTube placement for a more in-depth explanation. Adapt framing and captions for each screen.
Tell viewers what to do after watching, such as exploring product details, starting a trial, or requesting a demonstration. Use one action that fits the page, then assess whether viewers complete it.
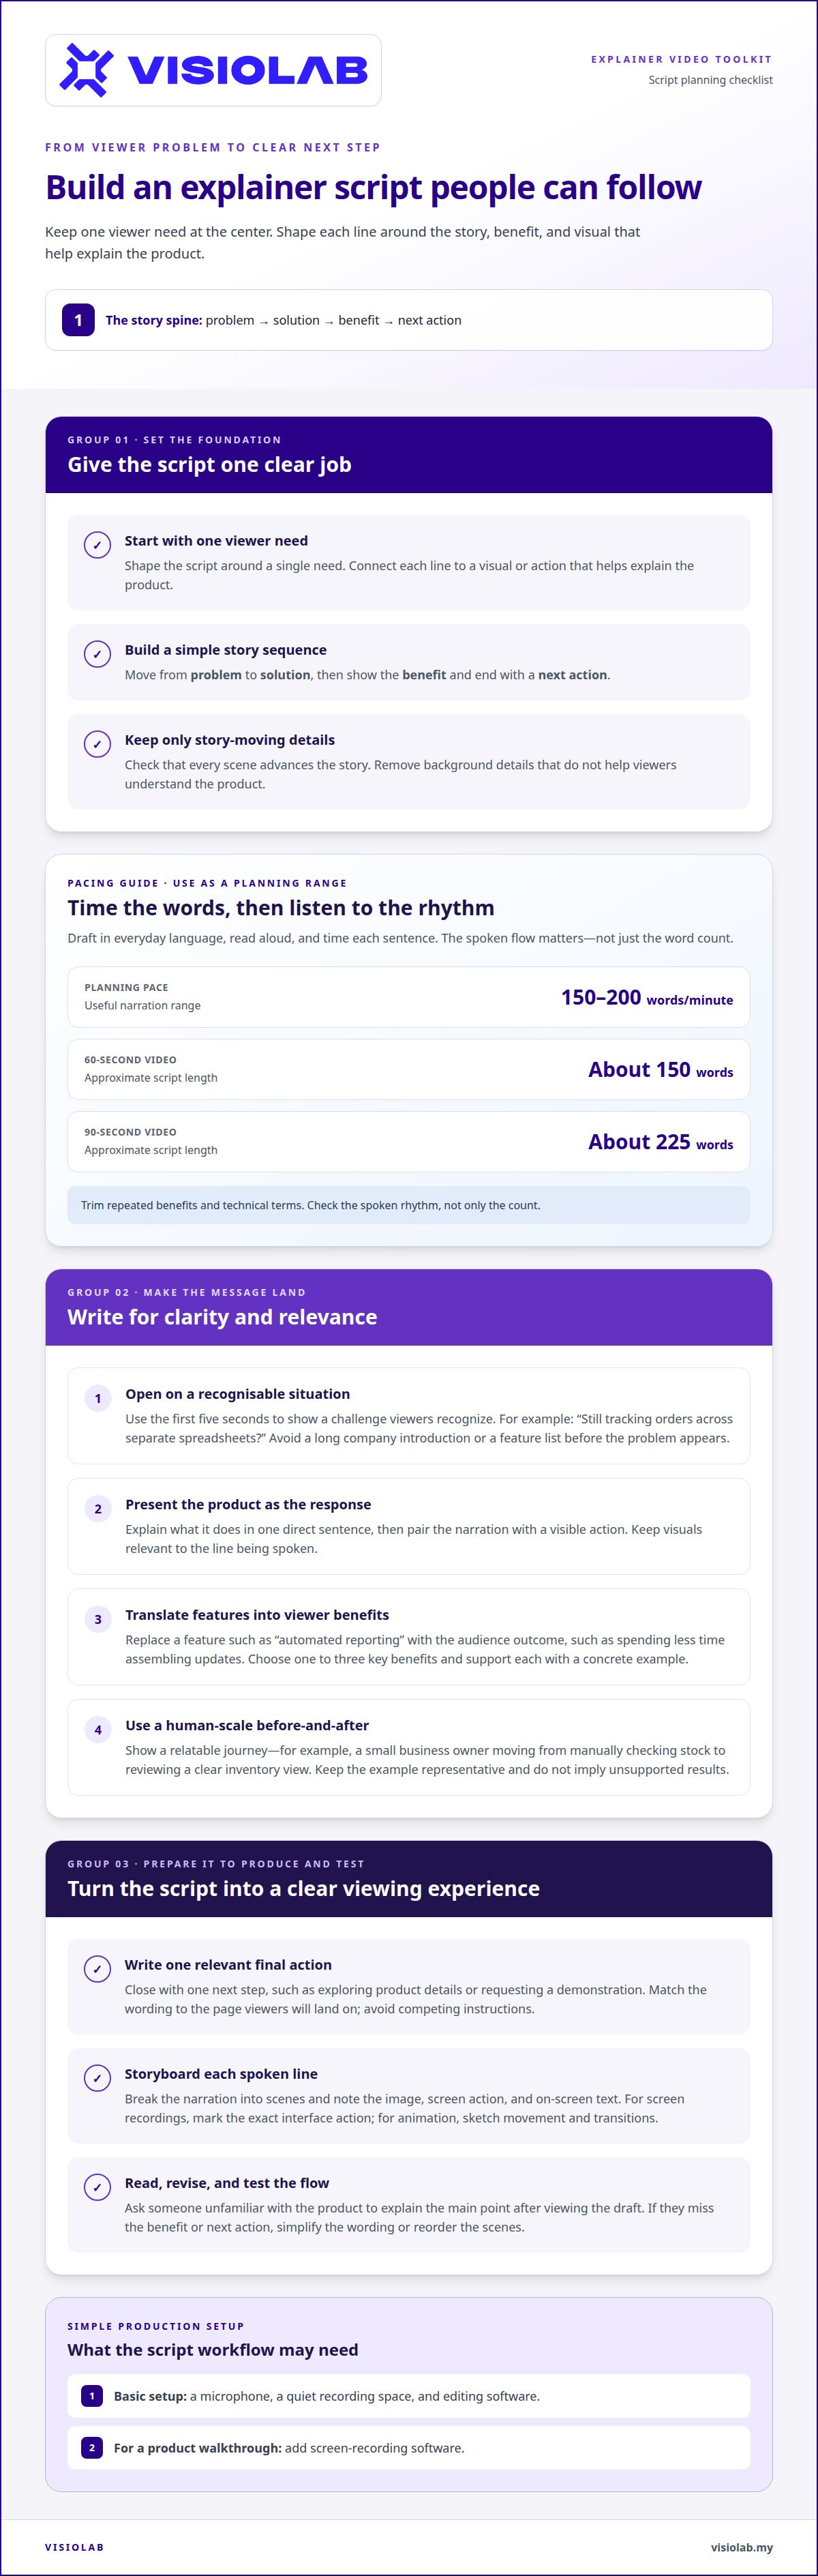
A basic setup requires a microphone, a quiet recording space, and editing software. For a product walkthrough, add dedicated screen-recording software like screenify.studio. Shape the script around one viewer need, and connect each line to a visual or action.
Start with the viewer’s problem, then build a simple sequence: problem, solution, benefit, and next action. For example, a software explainer might open with a team struggling to find project updates, then show how one dashboard brings them together. Check that every scene advances the story, and remove background details that don’t help viewers understand the product.
Draft the narration in everyday language, then read it aloud while timing each sentence. A script paced at about 150-200 words per minute gives you a useful planning range. A 60-second video allows about 150 words, while a 90-second version allows about 225. Check the spoken rhythm, not just the word count, and cut repeated benefits or technical terms.
Use the first five seconds to show a recognisable challenge. “Still tracking orders across separate spreadsheets?” gives viewers a clear reason to keep watching. Avoid a long company introduction or a list of features before the problem appears.
Explain what it does in one direct sentence. Follow with a visible action, such as a user bringing several updates into one screen. In an animated explainer, coordinate each visual with the narration instead of showing unrelated motion.
Replace “automated reporting” with the audience outcome, such as spending less time assembling updates. Choose one to three key benefits, then support each with a concrete example. This keeps the marketing message focused on what changes for the viewer.
Give the viewer a simple before-and-after journey. A small business owner might move from manually checking stock to reviewing a clear inventory view, just as early childhood software like Kinderflow might show a creche manager replacing paper files with streamlined digital tracking. Keep the example representative, and don’t imply results the product cannot support.
Close with one next step, such as exploring product details or requesting a demonstration. Match the wording to the page where viewers will land. Avoid competing instructions that divide attention.
Break each spoken line into a scene, then note the image, screen action, and on-screen text. For a screen recording, mark the exact interface action. For an animated explainer, sketch movement and transitions so the visuals clarify the message.
Ask someone unfamiliar with the product to explain the main point after viewing the draft. If they miss the benefit or next action, simplify the wording or reorder the scenes. For complex messages, script-to-storyboard planning can align narration, visuals, and timing.
Start with the people the video needs to reach and the decision it should support. A clear target keeps the message relevant, while a defined objective guides the creative choices that follow.
Gather recurring questions from customer conversations, support messages, and sales discussions. Look for specific moments when people get confused, lose time, or hesitate to act. For example, a buyer may understand what a software tool does but struggle to picture how it fits an existing workflow.
A first-time buyer may need context, while an existing user may need help with a particular feature. Avoid treating every viewer as having the same experience or knowledge.
Focus on a concrete challenge rather than broad frustrations. Check that the product can visibly demonstrate a relevant solution, and avoid building the video around assumptions about the audience.
Choose one purpose, such as explaining a product’s role, supporting a launch, or helping viewers take a next step. To create an effective product explainer video, connect that purpose to one audience need and one intended response.
State what viewers should understand or do after watching. For example, a video introducing a new platform feature could aim to help existing customers find and use it.
Explain who the product helps, which problem it addresses, and how it works. Keep claims aligned with the product’s actual capabilities.
Shape the voiceover, examples, and visual language around both the brand and the target audience. For example, an experienced technical audience may respond to a precise workflow, while new buyers may need everyday language and a guided demonstration.
Use familiar vocabulary and an appropriate tone, but make clarity more important than slogans or internal terminology.
As you decide how to create an effective product explainer video, check that each scene, graphic, and spoken line supports the same message and objective.
Use the chosen pain point as a filter when reviewing the treatment: explain how the product or service resolves that particular difficulty, rather than simply describing features. This keeps the viewer’s problem central throughout the video. Make the style and tone fit the brand and its target audience, and ensure the graphical elements reflect the brand’s voice. Narration, examples, and visuals should feel like parts of the same communication, not separate choices. If an element distracts from the problem or makes the solution harder to understand, revise it to keep the message focused and consistent.
Choose placements and visual formats based on the viewer’s next decision. Common mistakes include using one version everywhere, crowding scenes with text, and choosing animation for style rather than clarity.
Put an explainer on a landing page when visitors need product context before acting. Use an email to introduce one benefit, then link to the relevant details. A YouTube ad can reach viewers earlier, while a product page can support people already comparing options.
YouTube supports horizontal 16:9 and vertical 9:16 video; widescreen suits detailed demonstrations. TikTok explainers work best at 30-60 seconds in vertical 9:16. Hook viewers within the first three seconds, before they scroll past the opening visual.
LinkedIn B2B explainers are recommended to stay under 90 seconds for engagement. Lead with the business challenge, show the relevant feature, and close with an action that fits the post, such as reading a product page or requesting a demonstration.
Use live action to show a physical product, a person using it, or a real setting. Choose a screen recording for software steps. Motion graphics can clarify data or processes, while an animated explainer can make abstract systems easier to see.
Use 2D for clean diagrams and simple sequences. Consider 3D when shape, depth, or movement matters, such as showing how a component fits inside a device. Whiteboard animation can guide viewers through educational ideas, but avoid it when the product itself needs realistic detail.
Keep labels short, use consistent colours, and make the featured product easy to identify. For example, highlight one interface button during a screen demonstration instead of showing several competing controls. Check that captions and text remain readable on a phone screen.
Adapt the opening, crop, captions, and call to action for each placement. A landing page version may explain the product more fully, while a social cut can focus on one benefit. Keep the core message consistent, but remove scenes that don’t support that version’s purpose.
Before publishing, review the video on a phone and desktop. Confirm that the opening scene, product feature, and final action remain clear in each format.
Plan the production scope before requesting a quote. Two videos with the same runtime can require very different work: a screen recording and a custom animated sequence have different creative and technical demands.
Specify the video’s purpose, audience, key message, and intended placements. A product-page explainer may need one master version, while a campaign across social channels may require alternate edits, aspect ratios, or opening scenes. Each additional version affects the amount of editing and finishing required.
A screen recording can suit a software walkthrough, while live action may need locations, people, and product filming. Custom animation involves designing graphics and movement. A 2D sequence with simple shapes differs in complexity from a 3D product visual with detailed modelling and motion.
A concise product explanation needs fewer scenes than a detailed training walkthrough. More scenes can mean additional writing, visual design, animation, recording, and editing. Keep only the information viewers need for the intended decision, rather than expanding runtime with secondary features.
Existing product footage or interface recordings may provide useful source material. Bespoke characters, environments, diagrams, and graphics require their own design and production work. For example, an explainer using a recurring animated character needs character design before scenes can be built consistently.
Narration, music, sound effects, subtitles, and colour or audio adjustments all shape the final video. A version with voiceover and captions requires different preparation from a silent screen demonstration with on-screen labels. Name the deliverables you need from the start.
A clear approval process helps keep script, storyboard, and edit decisions aligned. Consolidated feedback on a storyboard can prevent late changes to completed graphics. Specify who reviews each stage and which edits or platform versions are part of the requested scope.
A well-planned master can support edits for a landing page, email, or social placement. Reuse may require new crops, captions, or shortened cuts, so include these needs in the production brief rather than assuming every format is identical.
For this video production service, the price depends on the project scope and is given after a quote request; key factors include style, runtime, custom graphics, filming needs, and deliverables. To plan a production brief around those decisions, discuss your explainer video project.
VISIOLAB creates Explainer and Training Video content that turns complex product information into clear visual stories. It’s a natural next step when your team has a defined audience and message but needs help shaping them into a finished video.
For products or processes that are difficult to explain through text alone, 2D and 3D motion graphics can bring details into focus. The production can align the script, visuals, and intended placement, helping viewers understand what the product does and what action to take next. This approach also fits training content where clarity and consistency matter.
If your message is ready to take shape on screen, contact VISIOLAB to discuss your explainer video.
A product explainer can become more than a single campaign asset. Treat it as a starting point for a consistent visual language across product communication, staff learning, and broader brand storytelling. An effective product explainer video starts with the message you want viewers to carry forward, then gives it a form they can understand and remember.
VISIOLAB offers Explainer and Training Video, Corporate Video, and ESG Video. These formats can support different communication needs while keeping each story focused on its audience and purpose. The next step is to bring your product, audience, and intended action into one production conversation.
Contact VISIOLAB to discuss your video and shape a clear direction for your project. Your next story can start with one useful message and grow from there.
An effective product explainer makes the product’s value easy to grasp and believable. Show evidence that supports the claim: a physical product in use, a relevant interface, or a process made visible through graphics. For example, if the product helps organise information, show how a viewer moves from scattered inputs to a clearer view. Viewers should understand both the benefit and its relevance to them.
Plan the script around one audience need and a product demonstration that supports it. Before drafting, gather the approved product description, the terms customers use, and any details that must be accurate. Then check the narration against the real product or interface. For example, a software script should describe actions shown in the screen recording, so the spoken explanation and visual evidence stay aligned.
A straightforward product explainer often works well at 60 to 90 seconds, while a detailed walkthrough may need more time. Let the viewer’s task guide the edit: someone deciding whether to explore a product needs a different level of detail from someone learning a multi-step process. Remove pauses and repeated explanations, but keep enough context for each demonstration to make sense.
Choose the format that shows the product’s value most clearly. Use live action when viewers need to see a physical item or someone using it. Choose screen recording to show software actions. Animation can represent concepts or processes that are difficult to film directly. For a product that combines software and hardware, a mixed format can show each part clearly.
Give each storyboard frame a purpose: note the narration, visual, on-screen text, and transition. Review the sequence for gaps, such as a claim without supporting visuals or a scene that adds no new information. Reserve the final frame for one relevant call to action. For example, a video introducing a product to prospective buyers could direct them to explore its specifications or request a demonstration.
Let’s create and collaborate
We’re versatile multitaskers, and we thrive on a lot of projects. You've seen a few of our works that we are most proud of, and your project could be next in line.

Empowering brands with captivating visual stories, creating strong connections and growth.
